Copyright © Kerry's Cool Creations
Design by Dzignine
Showing posts with label Mixed Media Canvas. Show all posts
Thursday, 13 August 2015

Long Time No See, Welcome to my August Prima PPP Entry! (Lots of Pics!)

A quick hello and a grateful thank you for dropping by to check out my entry into this month's Prima Product Picks Challenge.

The inspiration board that was posted on the Prima blog was:

My finished project based on the inspiration board looks like this:

While I did post some sneak peeks along the way on Instagram, like these:

Instagram Sneak Peek #1
Instagram Sneak Peek #2
Instagram Sneak Peek #3

Here is a summary tutorial with more detail on what I used and how it all came together. :)

Products:
  • Creative Embellishments chipboard pieces
  • Other chipboard pieces (unknown source)
  • Golden Arts Light Molding Paste
  • Golden Arts Seed Bead Gel
  • "Generic" brand white gesso
Process:
  1. Cut apart and glue down chipboard pieces to canvas
  2. Paint with a couple coats of gesso
  3. Stipple on molding paste to create small peaks
  4. Add seed bead gel as desired
  5. Paint with another couple coats of gesso

Products:
  • Prima Finnabair stencil
  • Prima color bloom sprays
  • Liquitex Modelling Paste (not pictured)
  • Many other sprays, at least 3 others (not pictured)
Process:
  1. Use modelling paste with the stencil to create more
    background texture
  2. Spray with shimmery colour sprays until desired
    colouring is achieved. :)

Products:
  • Prima floral vine
  • Prima large flower
  • Prima small flowers
  • Liquitex clear gesso (not pictured)
    - Get it? It's clear gesso. :P
  • Other random flowers (source unknown)
  • Stickles (not pictured)
  • Wooden polaroid frame (source unknown)
  • Lettering (multiple sources)
Process:
  1. Add Prima vine
  2. Add Prima large flower
  3. Add Prima small flowers
  4. Add chipboard pieces to the back of the wooden
    polaroid frame to add dimension
  5. Use clear gesso on polaroid frame
  6. Use all the same sprays and stickles on the frame
  7. Adhere frame to the canvas :)
  8. Add lettering as desired
  9. Add all the other embellishments your heart desires
No filter - This is genuinely how bright the canvas is while hanging on my fence. :)
I clustered my flowers along the side of the canvas as well. :)
A close-up of the cluster
A close-up of the frame area

More photos because I love this project and felt a different background could help some people, maybe? :)


HOLY PHOTOS!
If you have any questions, feel free to ask away! :)

Thanks so very much for stopping by!!!

Krafty Kerry signing off!
Monday, 20 April 2015

Prima Build a Page Challenge Entry, April 2015

Thank you to Keren once again for designing a sketch I can get behind for the Prima B-A-P challenge for April. :)

My take of the sketch was done on a wooden mini canvas.
I kept the tones monochromatic using red as my base.

I added 3 types of glitter and used paper and embellishments from the Prima Princess collection as well as a resin frame.

For the painted background, I used acrylic paint as well as modelling paste to give it more texture.  I feel like the texture isn't well captured in the photos here, and I will try to add another more textural photo for you to see. :)

I also feel like it's missing dark accents, but I'm not sure if I should just go with black or use red to compliment the monochromatic feel... It's one of those things that if I thought about it too long, I'd never consider this finished, so I stopped thinking about it, and I'm calling it done (for now).


Thanks so much for dropping by!!

Krafty Kerry signing off!
Friday, 10 April 2015

Prima Marketing Projects I've Made and Would Like to Share

One of my favourite crafting oriented companies is Prima Marketing.

They provide products for people in all aspects of crafting, and that is something I truly appreciate. It is a company that allows growth as an artist, scrapbooker, card-maker and more because of the HUGE variety of products available from the company.

In addition to that, when the paper collections come out, a TON of coordinating embellishments are also released to make creating projects that much easier!! Not to mention the other products like stencils, mediums and more! *dreamy sigh*

In case you're wondering:
- My favourite embellishments to use from Prima include the flower vines and resin pieces. I hoard resin pieces like it's nobody's business.
- My favourite paper lines that have been released include Romance Novel & Cartographer.

Here is a series of Prima based projects I've completed, mostly within the last 6 months.

First up, some canvas projects I've worked on:


Below are some card projects I've worked on:


Thanks so much for dropping by!

Krafty Kerry signing off!
Monday, 30 March 2015

Shabby Chic Mixed Media 6x6 Burlap Canvas Finished

Alright, alright!

Here is a burlap canvas I completed for a canvas swap I'm in!

It's shabby chic-ish I guess and I *love* it!

The flowers are from Wild Orchid Crafts I believe, and I glittered them up using matte gel medium on the petal edges. I wanted to add glitter to everything after I was done working on this canvas! LOL

Some pictures to leave you with!


Thank you for dropping by!!

Krafty Kerry signing off!
Tuesday, 17 March 2015

Mixed Media Mini Canvas Swap Exchanged!

These are the awesome canvases that I received in exchange for those that I made and posted about here: Mini Canvases, Set of 4, Mixed Media Tutorial (Lots of Pictures).

I love them all and can't wait to add them to my gallery wall in my room!


What gorgeous pieces of inspiration. I'm so glad I got in on this swap and greatly look forward to the next batch of canvases I'm scheduled to receive!!

Thanks for dropping in!

Krafty Kerry signing off!
Friday, 13 February 2015

Mini Mixed Media Canvases Again! Set of 6! Tutorial Inside (Lots of Pics!)

My love for mixed media is really coming loose these days.  I'm loving being able to use what I have and make wonderfully pretty things! I have So. Many. Things. so it's seriously nice to go through my stash and use things up as I find them!

Here is another set of canvases I've created, with a tutorial!

Most of these things can be purchased from the Flying Unicorn store - I received most of the product used in past monthly kits from the Flying Unicorn. :)

The tutorial starts... now!

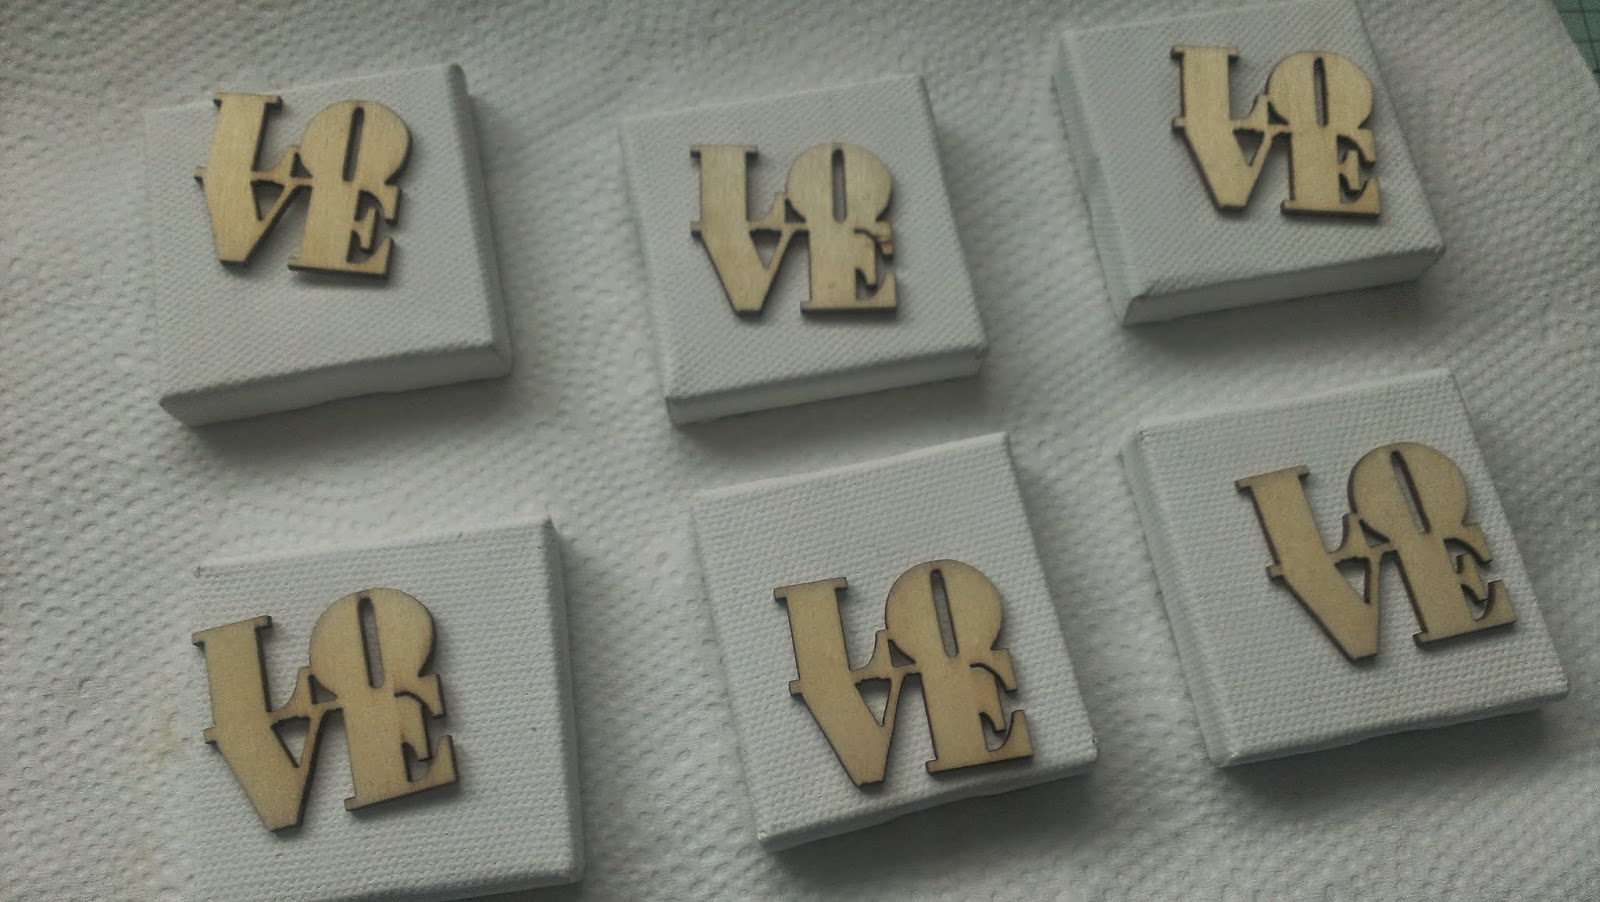
This is where I started  - A 6-pack of 2" x 2" canvases!


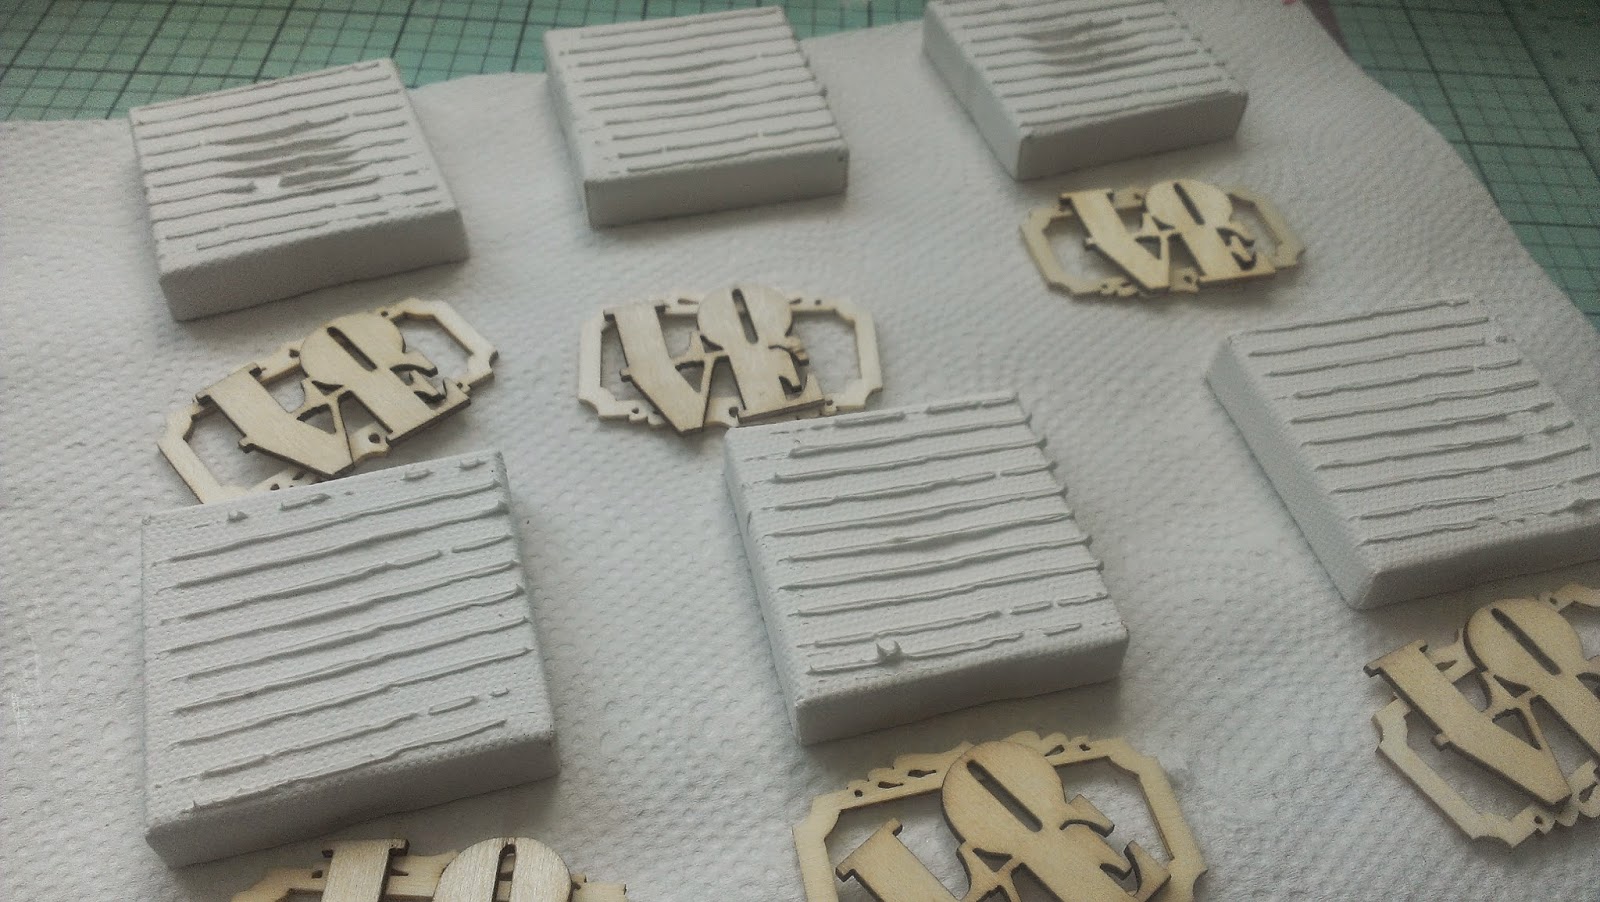
Here, you can see that I've used two packs of Prima wooden icons from two different collections. I thought it appropriate when I spotted the "LOVE" icons for these canvases!!  I added the frame to add more depth.

Here I used my 13arts stencil that I can't get enough of to create a lined background on the canvas to add  texture!
I gesso'd each wooden icon individually since I wasn't exactly sure the route I was taking for these canvases.


Here I sprayed all the canvases and wooden icon pieces with the "I'm late slate" Lindy's spray. I just kept adding layers, until I ran out of the spray. So happy to call it done!

In this pic, I 'm not sure how well it will show on different people's screens, but I did use this PanPastel cake thingie to add much shimmer to the canvas.
More colour & shine  was needed, so I added some of the BoBunny copper glitter paste  to the canvas, frames and the edges of the word LOVE.
After adding the BoBunny paste, I used my 13arts spray on some cheesecloth. Then I layered the cheesecloth on the canvas under the frame and the word love, and then sprayed the canvases each with one spritz of the 13arts spray.

The canvases looked lacking in glimmer, so I went over each canvas again with the PanPastel cake thingie! 

This is the final result. As you can see, I added two tiny rosebuds and added the BoBunny glitter paste to those as well.  :)


Thank you so much for stopping by!

I love getting feedback on my work & my tutorials, so feel free to leave a comment or question!

Krafty Kerry signing off!